Total Pageviews

Tuesday, February 28, 2012

Finally...bag from a pillowcase "pattern"

I had a rough weekend...working...so I didn't get around to even starting the pillowcase bag.  When I was lamenting this fact on Sunday night to Trevor, he said he thought my "tens of followers" would understand if I skipped one post.  Gee thanks, Hon.  I feel soooo much better, now.

Anyway, this is a very simple set of bags to make.  I say bags because you will be able to get two bags out of each pillowcase you cut. 

1)  Cut a standard pillow case in half the short way.

2a)  For the "bottom" half of the pillowcase:  Fold the raw edge to form a seam and sew all the way around.  (I marked 1" and folded twice...it made for a pretty small seam, but it did the job.)

2b)  For the "top" half of the pillowcase:  Sew a 1/2" or 5/8" seam across the bottom raw edge.  The top seam is already done.  YAY!

3) If desired, box the corners.  Turn the bag inside-out and make the corners into an "arrow"; mark the bottom of the equilateral triangle and sew across the line.  Make sure the same distance is used on both corners or else you will have a funny bag...

Inside of boxed corner...see the "arrow"?

How the boxed corner looks like finished.
4)  Add the straps, sewing the boxed X method--use whatever material you want for straps.  I used 24"-long pieces of 1" webbing.  Webbing can be expensive, so other possibilities would be denim from old jeans, left-over pieces of cotton or other fabric, old towels cut into strips, etc.  If you use cotton or another lighter fabric, you may want to put some heavy interfacing inside the middle.  I just stole some webbing from Trevor's industrial sewing shop...after his "tens of followers" comment, he deserved it!  Also...if you want longer or shorter straps, go for it!  It's your bag after all!

Boxed X
So...in about 30 minutes, you too could have two shopping bags!  Just FYI...the bag from the "bottom" of the pillowcase will be a couple of inches shorter than the bag from the "top" of the pillowcase. 

This same basic idea works great for beach towels, sheets, any large piece of material.  Adjust the sizes a bit, use a drawstring, and VOILA! you have gift bags...easy!

Have a super leap day, and take care of you!

Friday, February 24, 2012

Free Bag Pattern Links

Reusable bags are not only great for the environment, but they are also a great way to become more comfortable with sewing because they are mostly straight line sewing (until you get to the fancy purses) and they are forgiving--if your seams aren't perfect, it really doesn't matter.  The bag will still hold stuff!  Also, you don't have to use fancy fabric--I mean you can--but you don't have to.  I use scrap pieces from other projects, old jeans, pillowcases, old sheets, etc.  I've also made panels for bags on which I had practiced free motion quilting.  My free motion quilting is atrocious, but it works fine for the side of a bag!

So get started!

I had promised some links to free bag patterns on Wednesday, but I didn't get to it...Sorry!  Here are some links and ideas:

Joann's Fabric has 356 free "bag" patterns--all kinds of bags--all kinds of skill (sewing, paper, crochet, knitting, etc.):
http://www.joann.com/search/_bag?page=1&psize=48&isPrj=1

I made a bag from this linked pattern at Joann's website, and it was easy...
http://www.joann.com/market-bag-coupon-holder/xprd530170/

Photo courtesy of Joann's Fabric website
Craftgawker.com also has tons of free purse/bag patterns:
http://craftgawker.com/post/category/bags-purses/

Go for it!

Friday Finds

Did anybody watch "Happy Endings" on ABC on Wednesday night?  I feel Max's pain--I, too, turn into a grumpy bear when I am completely tired of winter.  I am usually sick of winter long before it is gone from the Nebraska plains.  I had a bad case of cabin fever this last week...yikes!

Last Friday, I drove east of my wonderful town to check out the thrift stores in a couple of other towns.  I hit the "crafty" jackpot.  I was able to purchase two pillow forms (still in the plastic) for $1 each!  Plus, I purchased a bunch of buttons and trim in silver/gold for Christmas ornaments for $0.05 - $0.25 each!  I also bought a few more pillowcases, so I really must make my Monday project this next week shopping totes out of pillowcases.  They are SUPER EASY!
A few other goodies...a little boy figurine that I will put out at the cemetery, a Beatrix Potter book for $0.25, a Pampered Chef bread pan for $4, and a pair of Eastland shoes for $4.  What a good trip!

Have a great Friday, and take care of you!

Wednesday, February 22, 2012

No-Sew Shopping Bag from Post-Consumer Trash

Do any of you have a bad eating habit?  I do!  One of my bad habits is Jimmy John's Sandwich Shop--the sandwiches aren't bad for me (I have them without mayo or cheese to reduce the fat/calories), but I just can't seem to bring myself to eat a sandwich without eating a bag of chips.  That is just not the American way!

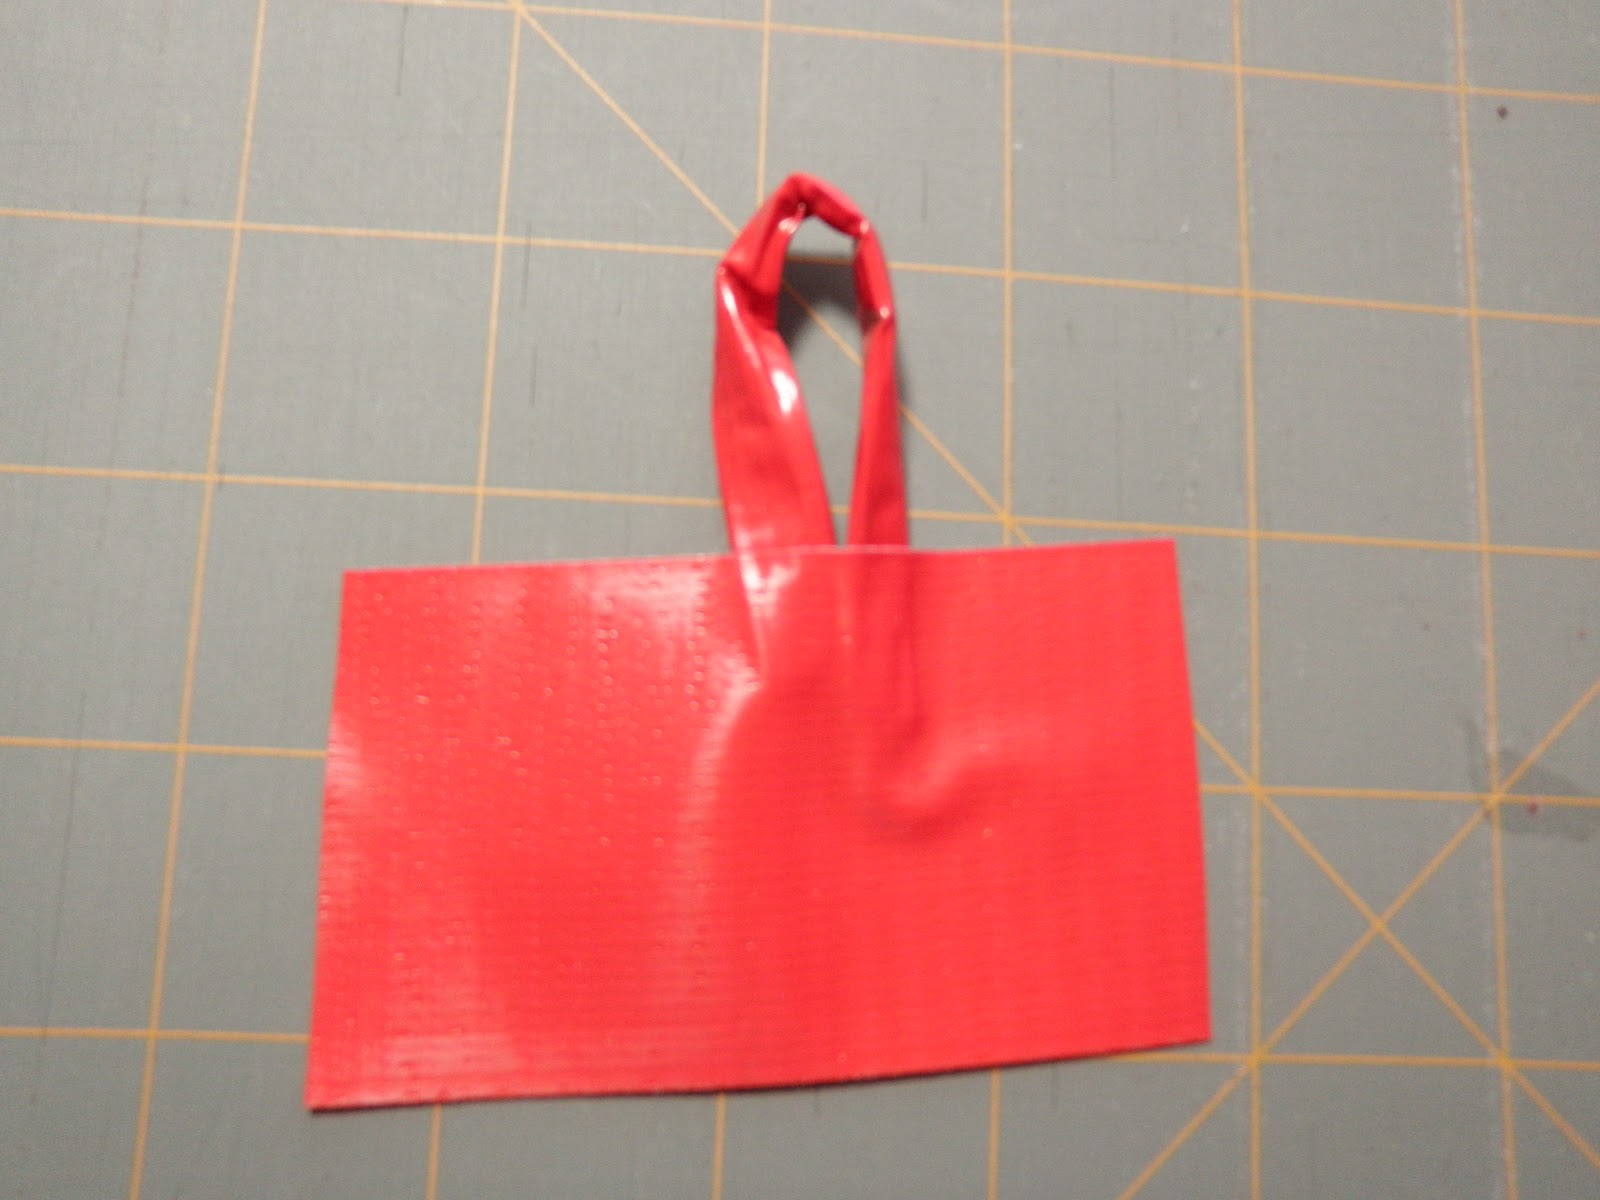
So, I started keeping my chip bags to use to make a bigger, reusable shopping bag.  Here's the result:

What do you need?
*  16 (or more) chip bags...You don't have to use single serving chip bags...If you are using big bags, you would (of course) need fewer!
*  Something for the bottom of the bag.  If you have enough chip bags, you could just use those.  I used TYVEK (strong grey plastic used for shipping weird shaped stuff) that was wrapped around something that was delivered to our house
*  Duct Tape - whatever color you want to use or can find.  I used red, made in the USA duct tape purchased from my local Ace Hardware store.
*  Scissors
*  Measuring instrument...I used my rotary cutter, mat, and ruler.  It worked awesome!
*  Patience

How do you do it?
1)  Cut the fronts off of the chip bags, and clean the grease off with soap and water.  Allow to dry completely.  Try to keep approximately the same border around the front graphics...this will just make your life easier in the following steps.  If one of them tears down the middle -- just throw it away...it will cause more havoc than it is really worth.

2)  Cut the chip bag fronts so that they are all the same size; Mine measured 5" wide by 7 1/4" long.  This isn't as exact as quilting, so you can fudge a little, but the closer they are to the same size the better.

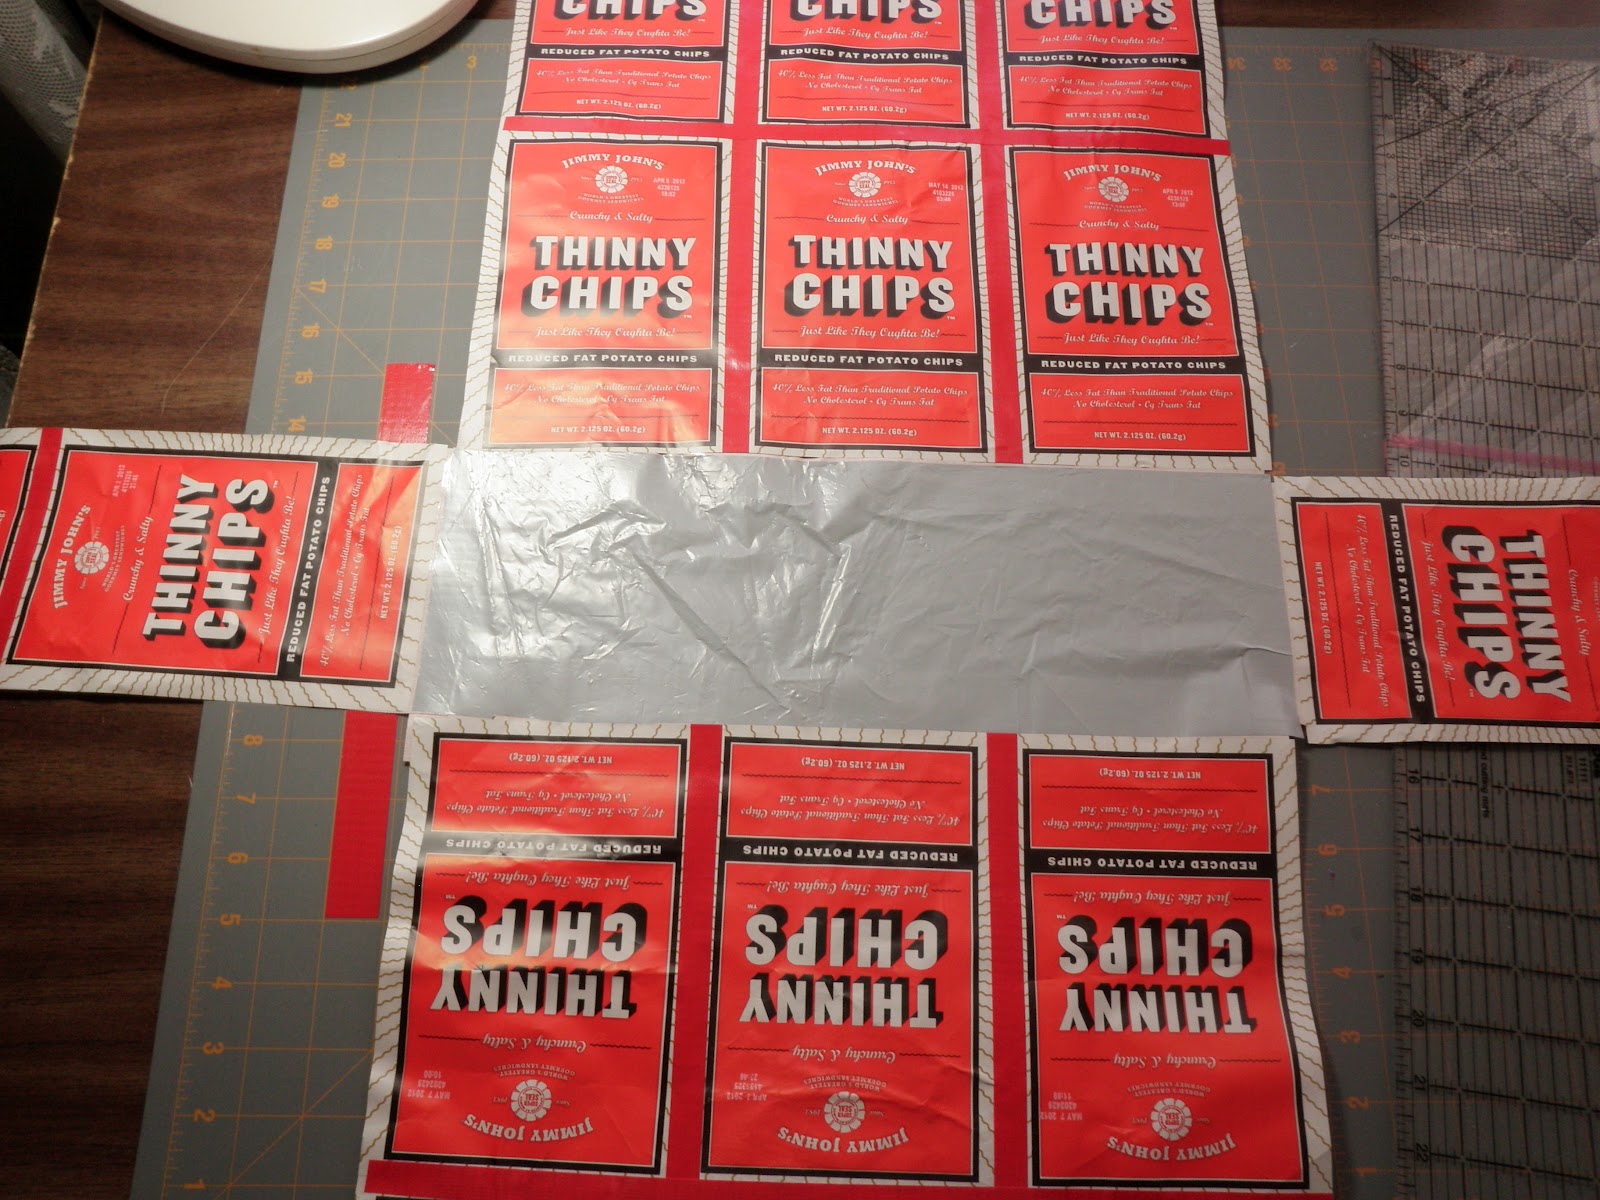
3)  Make the front and back of your bag.  Cut a 15" piece of duct tape (or however big you need based on the recycled items you are using) and lay it down sticky side up.  Carefully put the top left corner chip front down the approximate middle of the duct tape.  Add the bottom left chip bag front down the approximate middle of the duct tape, trying to line up the designs so that they match.  Add the middle chip bag front to the remaining exposed duct tape; then the middle chip bag bottom. 

Cut another 15" piece of duct tape and repeat the process with the right side of the middle section and added the left side pieces.

4)  Cut another piece of duct tape and tape the horizontal seams on the inside of the bag.  Repeat for the other large side of the bag (6 bags for front large side; 6 bags for back large side.)

This is what the wrong side of the bag front/back should look like when completed.
5)  For the narrow side pieces, tape two chip bags together on the short side (inside of the bag.)

6)  Trim any excess tape and measure to make sure the front/back measurement is approximately the same and narrow side measurements are also approximately the same.

7)  Cut duct tape 15" long and then divide into four equal pieces (the long way) so that you have 4-15" pieces that are around 1/2" wide.  Use the pieces to cover the right-side the seams.

8)  Cut the bottom--15" long by 5" wide.

9)  Join the wrong side seams to the bottom so that a "+" is made.
Ignore the odd piece of red duct tape underneath the left side of the picture...just forgot to remove it before snapping the picture.
10)  Now for the tricky part!  Make the standing corners by cutting 15" pieces of duct tape and attaching to the wrong side of the short sides.  (I did one corner at a time.)  Try to match the front seams together to get a nice look.

I know it is a strange picture, but I am trying to show you how the finished corner should look on the inside of the bag.
11)  Once all of the inside corner seams have been taped together, you can do the outside corner seams by cutting 15" by 1/2" pieces of duct tape to go around all 8 corner seams.
12)  Put a single piece of tape all the way around the top of the bag to give it some extra strength.

13)  Add the cashier loop:  Roll a 5" piece of duct tape the long way and make into a 'U' shape.  Tape to the inside of the bag in the middle, back side of the bag.

14)  To make the handles, fold 2- 24" pieces of duct tape in half which will give you 2- 12" pieces.  Tape as desired on the wrong side front and wrong side back of the bag.

End cap--If I do another bag like this, I think I will use contrasting tape instead of tape that blends in so well.  I think black duct tape may have been a better choice.  Also, I don't know if I like the handles, but they will work for now.  Maybe you have a better idea for the handles.  I think that narrowing the handles to 1" might feel more comfortable in your hand.  If you went with 1" wide handles, you would only need 1-24" piece doubled over instead of the 2 listed in step 14.

I thought pretzel M&M bags would be cute, but I sure don't need to eat that many bags of those things! 

I will be adding a post with links to online bag patterns later on today in case you are interested.

What do you think of this project?  What are you working on to further your creativity? 

Hope you are having a wonderful day, and take care of you.

Monday, February 20, 2012

Mixed-up Monday

Switch-a-roo--book today and project on Wednesday

Plastic grocery bags are horrible.  I feel that everyone should take the time and make the effort to take reusable bags with them when they shop.  I'm not saying that I always remember, but I do make a conscious effort to do so.

There are TONS of books, patterns, and tutorials on the web on how to make bags of every size, shape, and style.  One that I've been leafing through is called BAGS: THE MODERN CLASSICS by Sue Kim.

http://www.amazon.com/Bags---Modern-Classics-Clutches-Satchels/dp/1607053888/ref=sr_1_1?s=books&ie=UTF8&qid=1329752021&sr=1-1#_
 The book has directions three general types of bags: Small Bags, Clutches, and Large Bags.  The book also has each project rated by difficulty; this is always nice if you aren't super confident about your sewing abilities.  The front says "19 projects & 75+ bags" meaning that each bag is shown in a variety of materials. 
I really like that in addition to written instructions, there are pictures of each step of the sewing.  It is always nice to have that extra clarification.

For Wednesday's post, I will show you how to assemble a no-sew bag.  I will also give links to several free patterns on the web.  The best thing about these reusable bags is, of course, that fewer plastic bags go into landfills.  I also love that the bags don't have to be fancy...just functional.  You can use WHATEVER works...they don't have to be expensive or purchased from the store.  You probably have material in your house at this very moment that would make an excellent bag.

TIPS FOR USING REUSABLE BAGS
1)  If you have multiple vehicles, put a few in each vehicle so they are always there if you make a surprise trip to the store.
2)  I bike a lot, so I put a few in my purse...just in case.
3)  I have a lot of them!  That way I always seem to have them around. 
4)  If you make your own bags, don't make them too big.  It seems that stores will only put 2-3 items in a plastic bag, but they will try to stuff a whole cart in a reusable bag!  Also, don't be afraid to "help" the folks pack the bags by telling them when to stop stuffing the bag.
5)  Don't be embarrassed!  Some stores in our area give a $0.05 discount for each bag used, so I've heard people say that they don't want to be "cheap."  It isn't about the discount!  It's about the environment!
6)  I prefer to make my own bags out of materials that can be easily washed (denim, bed sheets, cotton) because the bags will get dirty.  I've found that purchased bags tend to shrink or fall apart when washed.  I don't know about you, but I prefer to put my groceries in clean bags...just sayin'!
7)  If you make your own bags, take the time to put a little loop on one of the edges of the bag.  Cashiers really appreciate that little loop that will hold the bag for them on the stand for the plastic bags.  Bags without the little loop don't stay open for loading.  It's just a little "kindness" to help the make the cashier's job easier.


Have a super Presidents' Day, and take care of you!

Friday, February 17, 2012

Random Thoughts on a Friday...

ENERGY--Have you ever had one of those days, weeks, months, years, etc. where you have lots to do, but you just don't feel like taking it on?  That was my week...I decided to blow off pretty much everything and just read fluffy romance novels.  It was a nice change of pace, but I better not do that all of the time!

SPRING--I wish it would get here, already!  I want to try growing my own flowers from seed this year instead of spending way too much money at our local nurseries.  I have been saving all kinds of containers to use to start seedlings, but I think I have to wait until at least March 1 to actually plant the seeds since I can't put the flowers outside until May 15 (at the earliest.)

I thought about purchasing the seeds online, but that doesn't support my local economy, so I have been going to the hardware and plant stores to see if they have what I want.  I already decided that if they don't have what I want, I will just have to change what I want!

My favorites are good old stand-bys--petunias, snapdragons, and geraniums.  I know they aren't outrageous, but they are beautiful when in full bloom.  AND, they bloom all summer!


 I usually have several pots with this similar arrangement around my home.
Photo courtesy of apartmentsetc.com
I love snapdragons!  You have to be careful, though.  Snapdragons come in trailing, short, medium, and tall.  I accidentally ended up with three foot tall snapdragons in one of my pots last year...OOPS! 
Photo courtesy of syngentaflowers.com
I also plan on making my own seed tape for my vegetable garden so that my carrots, radishes, and green onions will be more evenly spaced this year.  Last year I did not get my carrots thinned out before they were too big to really thin out.  I ended up with some carrots wound around each other in ways that were somewhat disturbing!

BOOGER--Booger had his annual shots today.  He was not impressed.  I don't remember him ever being such a weenie at the vet before!  He whined and whimpered and tried to get away.  Then he left them a really fresh stool sample...I don't think they needed it to be quite THAT fresh...Now he is grumpy and pouting.  It must be terrible to be a dog!

Have a great day, and take care of you!

Wednesday, February 15, 2012

Lemon Bars

Crust:
1 cup butter
1/2 cups powdered sugar
2 cups flour

Topping:
4 eggs (beaten)
2 cups granulated sugar
4 Tablespoons lemon juice
dash of salt

Mix butter, powdered sugar, and flour.  Pat evenly into an ungreased 9x13 pan.  Bake at 350 degrees for 20-25 minutes (until edges start to turn brown.)

Pour mixed topping onto the warm crust.  Bake 20 minutes more.

The bars are best when they are allowed to set for four - six hours.  If you eat them sooner, they will just be gooier.

Above is the recipe for one of Trevor's favorite desserts.  He and his crew got to enjoy a gooey pan of lemon bars at lunch on Valentine's Day.  I'm happy to report that Trevor liked his little gifts.  He also said that the pork chops, mashed potatoes, and gravy were "perfect."

Monday, February 13, 2012

President's Day -- What a celebration!

I told Booger that I was going to make him the President of the United States:
Here's how I made him into President Lincoln--I made him a hat with a beard!  I used 1 piece of black felt, a small record, some black fleece scraps, 2 buttons, and a piece of 1/2" wide elastic (I used white, but I would use black elastic if I had it to do over again...), and some glue.  I did use my sewing machine on this project.

1) I folded the felt the long way, leaving about 3/4" single layer felt at the bottom.  I sewed the felt the long way along the bottom of the double layer felt and right along the top of the double layered felt.
2) Fold right sides together and sew the hat along the short sides of the felt.  Cut small notches in the single layer felt at the bottom.

3)  Flip the hat inside out so that the seams are on the inside of the "hat." 
4)  Attach the elastic to the small record.  {Amount of elastic?  I used the dogs as a guide, but the elastic will stretch out as you add the beard.  You may want to go just a little smaller than you think you need.}  You may have a better idea of how to put holes in the record than I had, but this is what I did:  I melted a small hole into the little record on each side of the label.  (My husband thought you could drill a small whole--but I haven't tried it.  I went the pyro route.)  Then I put a button on the top of the record and used it to anchor the elastic by hand-sewing the elastic to the button...so my layers were button - record - elastic.  I did this on each side.
5)  I used a glass that was about the same circumference as the hat as an anchor when I glued the top of the hat to the record.  The notches are what is actually glued to the record, so I put glue on the notches and worked them under the glass and then let it dry.
The glass is in the middle...holding the notches where I want them to be...
6)  I cut small strips out of some left over black fleece I had (about 1/2" by 5") to tie to the elastic to make the beard.  You could use whatever black leftover you have--yarn, felt, cotton...use your imagination.  You could "tie" the strips or use more of a latch hook type technique (which is what I used):
I did not put the beard all the way across the elastic because President Lincoln just had a chinny beard AND that would have removed the elasticity from the elastic...

Now for the result!

Lola got to try on the top hat before the beard was added...she's a pretty girl after all...no beard for her!
"This is not what I had in mind!"  Booger--you're so funny!
I think Shiloh channels President Lincoln the best...he has sad, tired eyes--just like President Lincoln.
Izzy, the cranky cat, was not impressed...
The hat is being used in the President's Day Display in the Children's Department -- on a teddy bear.

Now for some obvious disclaimers/warnings: 
*  If you go the pyro route on the record--be careful.  Hot things burn...Burns hurt...
*  Your dog/cat/critter really doesn't want to wear the hat for an extended period of time...so don't leave it on said critter when said critter is not supervised.  Critter will destroy the hat, and since there is a record and buttons, the dog/cat/critter will probably cut their mouth, their paw, their jugular vein and bleed to death OR they will swallow pieces of the record or the buttons and get a bowel blockage OR you get the picture...it may result in a hideously expensive trip to the vet and/or death.
*  Don't use a record worth lots of money...it will make you sad when you find out you ruined a record that would have made you rich...

Have a great day, and take care of you!

Friday, February 10, 2012

Finally! Good Finds on a Friday!

I found some great stuff last week at our local thrift shops!  We were awaiting a big snow storm, and apparently that scared most of the shoppers off--I practically had the stores to myself.  That was awesome!

I bought some material--some felt that I used for this upcoming Monday's project and the fake leather that I used to make Trevor's brass bags for the range (see previous post.)  The coolest thing I found were some quilt blocks--I got them for $0.50 a piece.
Aren't they gorgeous?!?  They are 12 1/2" squares.  I haven't decided if I'm going to put them together in a quilt or make little toppers for coffee tables.  My friend, Jane, thought that they would be great candle rugs.  What do you all think?

I also found some more whimsy for my yard/garden.

I don't think I'm going to go to the thrift shops today.  I have quite a bit of stuff for my projects, and I really need to clean my house.  Between being sick and starting this blog, my poor abode has been a bit neglected.  Time to spruce up the old girl.

I hope you have a super day, and take care of you!

Wednesday, February 8, 2012

Creativity, Saving the World, and a Totally Off-Topic Question...

I checked out the book Hoopla: the Art of Unexpected Embroidery by Leanne Prain from my local library this week.  If you want to see some truly strange things that people embroider, needlework, or cross-stitch...this is the book for you!  It's interesting, but it makes me think I am pretty boring!  I would never think of embroidering elaborate tattoos on dolls or embroidering anatomical graphics.  If you want to expand your way of looking at textile art, this is a good place to start.
http://rcm.amazon.com/e/cm?lt1=_blank&bc1=000000&IS2=1&bg1=FFFFFF&fc1=000000&lc1=0000FF&t=sewreclov-20&o=1&p=8&l=as4&m=amazon&f=ifr&ref=ss_til&asins=1551524066
Another book that may challenge your ideas of how important and great crafting can be is Craft Activism: People, Ideas, and Projects from the New Community of Handmade and How You Can Join In by Joan Tapper.  This book highlights different artists and regular people who use art to bring awareness to local and world problems or even take steps to solve problems about which they feel passionate. 
http://rcm.amazon.com/e/cm?lt1=_blank&bc1=000000&IS2=1&bg1=FFFFFF&fc1=000000&lc1=0000FF&t=sewreclov-20&o=1&p=8&l=as4&m=amazon&f=ifr&ref=ss_til&asins=0307586626
I was most inspired by a woman in France who began Morsbags.com in 2002 after a dead whale washed up on a Nomandy Beach.  The whale died because it had eaten so many plastic grocery bags.  Her idea?  Make inexpensive, reusable grocery bags from whatever material is readily available and give the bags away at grocery stores.  Her hope was and is that this act of kindness will encourage people to bring reusable bags with them when they shop.  There are now "pods" registered around the world that create 'morsbags' to give away locally; the website has free instructions for a simple shopping bag and labels to add to the bags in hopes that the good keeps on going...pay it forward style.  This woman is truly living the motto: "Think Globally, Act Locally."  For more information on morsbags, go to http://www.morsbags.com/

Now for the Totally Off-Topic Question:  What is the best hand-made baby gift?  I have a good friend who is due to have her second child in about 2 months.  I made a baby quilt for the birth of her first child, so I wanted to make something different for this little bundle of joy.  Since I don't have any children myself, I don't know what is most appreciated and/or used by new parents...any thoughts?  She's having another boy if that helps.  Thanks in advance for any advice you are willing to throw my way!

Have a wonderful day, and take care of you!

Sunday, February 5, 2012

Valentine's Day

I don't know how you feel about Valentine's Day, but I think it is a great time to think about all the real reasons you love those people around you...whether it is your significant other, your family, your friends, your neighbors...all those people that bring happiness into your life every day.

With that in mind, I usually try to think of things that Trevor has asked me to do that I have been procrastinating about doing or maybe have even forgotten that he wanted me to do for him.  When I asked him what he wanted me to do for him for Valentine's Day, he reminded me that I had never made him his own pillowcases;  I made around 40 pairs of pillowcases for gifts a few years ago, so I can see how he'd feel left out not receiving his own 'special' pair.  He also wanted some bags to take with him to the range to hold spent brass so he could bring it home to reload--easy enough.

Trev is enamored with anything WWII Militaria--so I bought 'vintage military pin-up' material a few years ago.  I made my nephew a set of pillowcases out of this material, but I had enough for another set specifically for Trevor.  I'm glad he reminded me...that's some material gone from my stash!  : )
I got this material--fake leather--at Goodwill for $0.35.  It made three brass bags that are basically over sized sandwich bags.  I think they look pretty darn spiffy!
I wanted to do the "52 Reasons I Love You" thing I've seen all over Pinterest; if you haven't seen it, the premise is that you right a specific reason you love your Honey on each card in a deck of cards and make into a book with ribbon or rings.  I guess you could even just leave them loose in the card box if you wanted to.  Anyway...I found an over sized deck of cards at Salvation Army a while ago for $0.49.  They are working GREAT for this project.  The cards are 5" x 7", so there is plenty of room to expound on the different reasons.  I'm having fun doing this project, and I suggest it to anyone out there with a Honey.  It's an exercise that really challenges you to think of all the wonderful things that first drew you to your Honey and the wonderful things that keep you with your Honey.

I'm also going to make him a sign for his reloading room that says "Trevor's Custom Ammo."  My Grandpa had taken down an old white picket fence on his property because it was rotten.  Grandpa was going to throw away all the wood.  I snatched a few pieces because they are cool.  So I'll make Trevor's sign on one of those pieces.

Last of all, I'll make him his favorite (extremely fattening) meal on Valentine's Day.  He always wants fried pork chops, mashed potatoes and gravy, and corn.  I'll probably take lemon bars to his work that day as well...he can only eat one or two bars, and I do NOT need a pan of baked goods just sitting around the house all day!

So, what are you doing for the special people in your life this Valentine's Day?

Have a super day, and don't forget to take care of you!

Friday, February 3, 2012

Friday Finds--Santas

I went to Omaha and spent time with my parents at four different thrift shops.  I had a great time with my parents, but my luck has really been poor at thrift shops lately.  All I found were some cute Santa ornaments for $1 each and a couple of pieces of Yorktowne Pfaltzgraff to go with my kitchen collection.
I know they are not old, but they are cute...
Trev and I also had the opportunity to see my Grandma Barb's new digs and went with her, my parents, and my sister to The Olive Garden.  YUM!  Trev went to gun shops while Mom, Dad, and I went to thrift shops.  My sister decided to just go home and take a nap as she was not interested in guns or thrift...she's 17...she just wanted lunch and then to be left alone!

I think it is just time for spring...time for auctions and garage sales.  Maybe then my luck will change.

Have a great day, and take care of you!

Wednesday, February 1, 2012

Doodle Stitching....

I've been stuck on the couch for the last few days (thank you, sinus infection), but in between bouts of unconsciousness I have been doodle stitching on denim for an eye mask.  Here's what I've done so far:

The great thing about doodle stitching is:  No Lines!  You just stitch whatever you want wherever you want!  You can make a picture or something abstract
Embroidery is a wonderful and easy way to add whimsy to just about anything...curtains, tablecloths, bibs, clothing, bags, wall hangings, anything with fabric...Here are some of my favorite books with cute ideas for adding bits of embroidery to your life:
http://www.amazon.com/Sublime-Stitching-Hundreds-Embroidery-How/dp/0811850110/ref=ntt_at_ep_dpt_7

http://www.amazon.com/Doodle-Stitching-Collection-Embroidery-Designs/dp/1600595812/ref=sr_1_1?s=books&ie=UTF8&qid=1328121836&sr=1-1

http://www.amazon.com/Stitched-Fun-Adorable-Embroidery-Projects/dp/1604681411/ref=sr_1_1?s=books&ie=UTF8&qid=1328121893&sr=1-1
 In addition to the books I've suggested above, there are always "Aunt Martha's Transfers" that you have probably seen -- there are tons of transfer patterns out there.  Of course, embroidery patterns are only limited by your imagination. 

Have a wonderful day, and take care of you!